
What Causes Paint to Bubble or Blister — and What It's Telling You
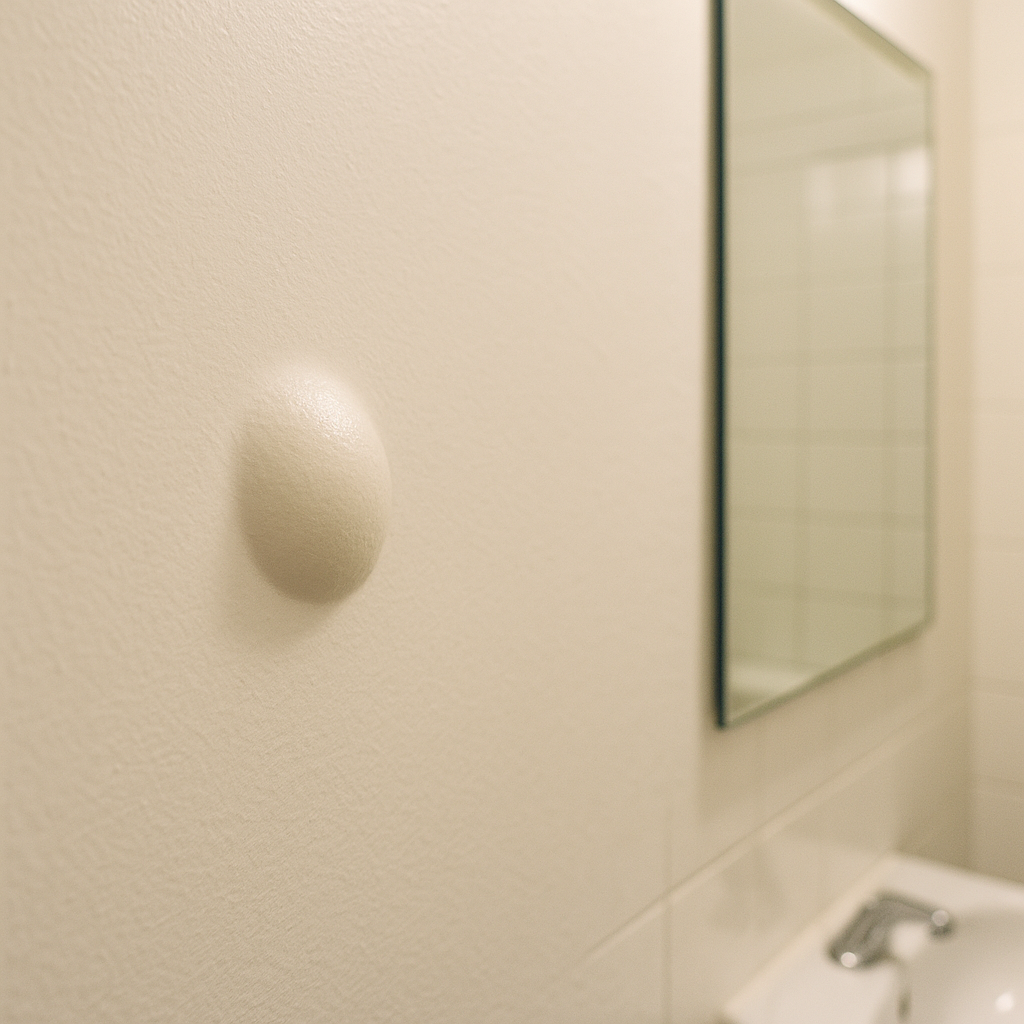
A raised bubble in a fresh coat of paint reads like a manufacturing flaw, as if the can was bad. It almost never is. A blister is a small dome where the paint film has lifted away from whatever sits beneath it, and something either pushed it up from behind or loosened its grip. The paint is the messenger here, not the culprit. Read the blister correctly, and it points straight at the cause, which is the only thing worth fixing before you paint again.
Blistering and cracking are cousins, but not the same failure. Cracking is a film that has gone brittle and split along the surface. A blister is a film that has come unstuck and ballooned outward. That difference matters because the two are driven by different forces and repaired in different ways.
A Blister Is a Loss of Contact
For paint to stay flat, every square inch of the film has to stay in contact with the layer under it. A blister forms the moment part of the film loses that contact and gets pushed into a dome. Two things do the pushing: pressure from behind, usually water vapor or solvent trying to escape, or a bond that was too weak to hold in the first place. Sometimes both at once.
That is why blisters cluster where trouble concentrates. You will see them over a plumbing wall, along a sun-baked south face of a house, above a shower, or on trim that was wiped down with a greasy rag before painting. The pattern of the bubbling is itself a clue, so look at where they are before you scrape anything.
Moisture Behind the Film Is the Number One Cause
Trapped moisture drives more blistering than every other cause combined. Water vapor moving through a wall, siding, or ceiling reaches the back of the paint film and has nowhere to go, so it collects and lifts the paint into a blister. Sherwin-Williams describes this as water migrating through an interior wall to the exterior and pushing the paint off the surface.
The moisture can arrive in several ways. A slow roof or plumbing leak feeds a wet spot behind the drywall. High indoor humidity from a shower, a stockpot, or a damp basement pushes vapor into the walls. Or the surface was simply painted before it was dry, sealing water in from the day the brush touched it. Painting latex over a surface still damp with dew or condensation does the same, especially where prep was skimped, and ventilation is poor, which is why kitchens and bathrooms bubble more than bedrooms.
The telltale sign of a moisture blister is what you find when you pop one. If the paint peels down to bare drywall, wood, or masonry, with nothing on the back of the flake, moisture rose through the substrate and lifted the entire coat.
Heat and Solvent Blisters Come From the Other Direction
The second family of blisters has nothing to do with a leak. These come from painting in the wrong conditions.
Paint in direct summer sun, or onto siding and metal already hot to the touch, and the surface skins over fast while the layer beneath is still releasing its solvent or water. Those vapors have to go somewhere, so they gather under the drying skin and lift it. The same happens when you recoat too soon or lay the paint on too thick: the top sets before the bottom has dried, trapping solvent underneath. Oil-based coats are especially prone to this because they cure more slowly, so a heavy film can skin over while plenty of uncured paint remains beneath.
The tell here is the opposite of a moisture blister. Pop a heat or solvent blister, and you will usually find paint still stuck to the back of the flake, or a previous coat underneath, because the film lifted between layers rather than off the raw substrate.
| What you see when you pop the blister | What it usually means |
|---|---|
| Bare wood, drywall, or masonry underneath, nothing on the flake | Moisture pushing up from behind the film |
| Paint or a previous coat on the back of the flake | Heat or trapped solvent lifting the film between coats |
| Blisters only on a hot, sunny wall or hot metal | Painted in direct sun or on too-warm a surface |
| Blisters over a bath, kitchen, or basement wall | Indoor humidity with poor ventilation |
Weak Adhesion Sets the Stage
Even without heat or a leak, a film that never gripped well is primed to blister. Paint bonds to what it can key into, and a few common shortcuts break that bond before the paint even dries.
Painting over a dirty, greasy, dusty, or chalky surface is the classic one. The coating sits on the contamination rather than the wall, so the slightest push from behind lifts it. Skipping primer on bare or patched drywall, raw wood, or a glossy surface removes the layer designed to grip the substrate and give the topcoat something to hold. And rolling fresh latex straight over old oil-based paint without sanding it dull first invites peeling and bubbling, because latex does not key into a hard, glossy oil film on its own. A quick scuff-sand and a bonding primer are what let the two work together.
How to Fix It Without Chasing Your Tail
You cannot paint a blister away. New paint over a blistered surface blisters again in the same spots, because the cause is still there. The order of operations is what fixes it for good.
Start by finding and stopping the moisture, if that is the type you have. Trace the leak, repair the caulk, add a bath or kitchen exhaust fan, or improve ventilation so vapor has a path out that is not through your paint. Sherwin-Williams notes that vents, exhaust fans, or siding wedges give trapped moisture somewhere to go. Then scrape off all the loose, blistered paint and sand the edges smooth so they do not telegraph through the new coat. Prime the bare spots so the topcoat has a real grip. Finally, repaint in the right window: on a dry surface, out of direct sun, when the surface and the air are within the range on the can, and thin enough that each coat fully dries before the next. Do those in order, and the bubbling does not come back.
What the Bubbling Is Telling You
A blister is short for a longer message: something is either pushing on the back of your paint or was never letting it grip. The dome you can see is the easy part; the value is in reading it before you reach for the scraper, because the same wall repainted without answering those question bubbles in the same place on the same schedule. A dome over the bathroom ceiling with bare drywall behind it is a ventilation problem no coat will cover; a cluster on the sunny wall with paint on the back of the flake is a timing problem. Match the repair to the type of blister, and the surface stays flat.
Frequently Asked Questions
Long enough that the wall is dry all the way through, not just dry to the touch on the surface. Drywall and framing hold water well after the drip stops, and a face that feels dry can still be wet behind it. The reliable check is a moisture meter reading on the substrate before you prime; if you do not have one, give it several days of dry indoor conditions with the area open and a fan moving air across it, and longer for thick plaster or a spot that stayed wet for weeks. Prime a wall that is still damp underneath, and the fresh coat lifts right back over the same patch.
Those rooms release a lot of water vapor from showers and cooking, and it rises to collect on the ceiling and upper walls. Without an exhaust fan vented to the outside, or with one that is undersized or never switched on, that vapor gets trapped in the paint film and lifts it. Running the fan during and for a while after a shower, and using a moisture-tolerant finish rather than a flat paint, does more than another coat ever will.
It narrows the cause fast. A single blister or a tight cluster usually marks a local source: one leaking pipe, a nail pop, a fastener rusting through, or a greasy thumbprint that broke the bond in that one spot. Widespread blistering spread evenly across a wall or ceiling points to something systemic instead, such as high room humidity, no vapor barrier, or a whole surface painted over chalk, dust, or without primer. Chase a lone blister like a leak; treat a bubbled-all-over wall like a moisture or prep problem across the room.
Often not. Shaking a can hard or working the roller too fast whips air into the paint, and that air surfaces as microfoam that breaks open and leaves little craters as the coat dries. It looks like blistering, but it comes from the roller, not the wall. The timing tells you which you have: microfoam and true application bubbles rise within minutes of rolling, while a real moisture blister shows up days or weeks later. Stir rather than shake, load the roller more slowly, do not overwork an area that is already tacking up, and if the pinholes vanish once you slow down, there is no adhesion problem to chase.
Only after you stop the water. A stain means a leak or condensation source is still active, and painting over it seals moisture in and invites blistering right back. Repair the source, let the area dry fully, then seal the stain with a stain-blocking primer so it does not ghost through, and repaint. Skip the repair, and you will be repainting the same spot next year.
It can, from both ends of the year. In a long, cold winter, warm indoor air holds moisture from showers and cooking that migrates toward cold exterior walls and windows, condensing where it meets the cold and feeding blisters and stains there. In humid summer stretches, the outdoor air itself is heavy with moisture. Either way, the answer is the same: manage indoor humidity with exhaust fans and ventilation year-round, not just in one season.
Seeing paint bubble or blister you can't get ahead of? Get a prep-first repaint that solves the cause. Cesar's Painting serves Minneapolis, St. Paul, Bloomington. Call (612) 203-5856.
