
Is It Safe to Remove a Popcorn Ceiling Yourself?
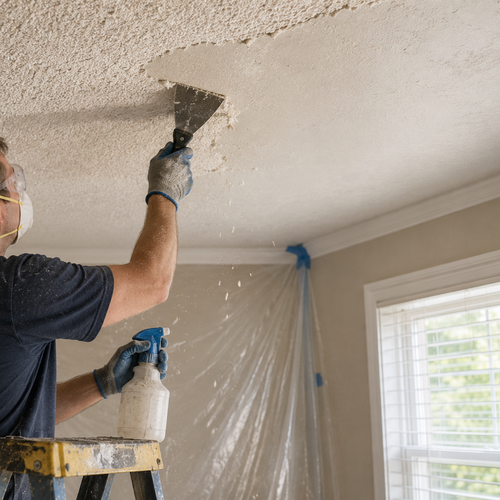
You are standing on a ladder in the spare bedroom, spray bottle in one hand, drywall knife in the other. The video made it look simple: mist the ceiling, wait fifteen minutes, peel the texture off in satisfying wet sheets. One afternoon, done.
Then you wonder when the house was built.
That question — just that one — is the difference between a messy weekend project and a hazardous materials situation. Get the answer before you touch a square inch of that texture.
Why 1980 Is the Line
Popcorn ceiling texture was sprayed on by the millions from the 1950s through the late 1970s. During that stretch, asbestos was a standard ingredient. Chrysotile — white asbestos — was mixed into the spray material because it added body, improved adhesion, and made the texture fire-resistant. It worked well. It was cheap. And it ended up on the ceilings of a huge share of American homes before the EPA banned asbestos-containing spray textures in 1978.
But the ban didn't clear existing inventory. Manufacturers could sell through what they'd already produced, which means some ceilings installed in 1979 and early 1980 still contain asbestos. Any home built before 1980 gets treated as suspect until tested.
Here's what makes scraping dangerous. When asbestos sits undisturbed inside sealed texture, it does nothing. The moment a blade drags across it, the dried material cracks apart, and chrysotile fibers go airborne. You can't see them. They carry no smell. They drift, and you breathe them long before they reach the drop cloth. Each fiber is needle-shaped — once lodged in lung tissue, it doesn't clear. Years go by. Decades, sometimes. Then asbestosis. Then lung cancer. Then mesothelioma. There's no safe exposure level, and no way to know you've been exposed until damage is already done.
If your home was built before 1980, do not scrape, sand, or disturb the popcorn ceiling before testing. A certified asbestos inspector can collect a sample in about 20 minutes; lab results typically come back within 1–2 business days. Professional testing runs $250–$800, depending on sample count and lab. If asbestos is confirmed, removal requires a licensed abatement contractor with sealed containment, HEPA-filtered negative-air machines, and certified disposal. Scraping an asbestos-positive ceiling without containment can spike airborne fiber levels more than 1,000 times above background — the exposure level that shuts down commercial abatement job sites.
For Post-1980 Homes: Not a Hazmat Problem, But Still Not Easy
If the house was built after 1985, or a test came back negative, you can set asbestos aside. The physical work is still messier and harder than the videos suggest.
Think of popcorn texture as a compressed sponge glued to drywall face paper. The texture itself has no structural strength — it's dried spray material sitting on a thin paper layer. Scraping sounds clean. But if the blade catches the paper underneath, you've added a separate drywall repair job on top of the removal job.
That paper damage happens in two ways. Scraping too dry: the texture hasn't softened, the blade has to work harder, and more pressure means gouges. Or over-wetting to compensate: too much water soaks through the texture into the gypsum underneath, leaving a mushy surface that tears under the blade. The correct window is narrow — wet the ceiling in small sections, 4 to 6 square feet at a time, let it sit 10 to 15 minutes until the texture softens but before the drywall absorbs the water, then scrape at a shallow angle, around 15 degrees. Round the corners of the blade with a file first. Square corners are responsible for most of the deep gouges.
Even a clean scraping job doesn't leave a paint-ready ceiling. Popcorn texture was applied specifically to hide what's underneath — the tape seams, tool marks, and slight unevenness that come with any ceiling installation. Once the texture is gone, every one of those imperfections shows up. Most ceilings need at least a skim coat of joint compound and a coat of primer before paint goes on.
What You're Likely to Find Underneath
| What You'll See | Why It's There | What It Takes to Fix |
|---|---|---|
| Tape seams and joint ridges | Standard installation — texture was meant to cover them | Skim coat + sand |
| Nail pops or screw dimples | Fastener movement from years of seasonal shifting | Spot fill with compound |
| Scraper gouges | Common even with care | Compound fill, sand flat |
| Water stains | Old leaks before or after texture was applied | Stain-blocking primer before paint |
| Torn face paper | Over-wetting or aggressive scraping | Skim coat over torn areas |
A ceiling that comes off cleanly with no paper damage is still a two-day project: scraping, skim-coating, sanding, priming, and painting. One with significant paper damage or old staining can stretch considerably further.
When DIY Makes Sense — and When It Doesn't
Testing came back negative. The house went up after 1985. The project covers one room, not a whole floor. You have a shop vac with a HEPA filter, full drop-cloth coverage, and a steady hand with a drywall knife. The ceiling is standard 8-foot height, not a vaulted great room where working overhead for hours becomes its own problem.
In those conditions, this job is doable. The main costs are joint compound, primer, and paint, plus a texture sprayer rental if you're going back to a new texture rather than smooth.
But it gets harder to recommend DIY when the project spans multiple rooms, when there's existing water damage underneath, or when the goal is a flat, smooth ceiling. Smooth ceilings amplify imperfections rather than hiding them. Every wave in the skim coat shows up under raking light once the paint dries. Getting a smooth ceiling that holds up takes practice — and skipping the practice usually means a second round of mudding, sanding, and painting to fix what went wrong the first time.
Frequently Asked Questions
You can't tell visually. Age is the only indicator, and that's not reliable on its own since some post-1978 ceilings used remaining stock. The only real answer is a sample test from a certified asbestos inspector — they collect a small scraping, send it to an NVLAP-accredited lab, and results typically come back in a day or two. Cost runs $250–$800 for a standard residential test.
Installing a new layer of 1/4-inch drywall over the existing ceiling is a legitimate option. It adds weight, which needs to be appropriate for your joist span, but it avoids disturbing the existing material entirely. If asbestos is present and the texture is intact and not crumbling, covering it is often preferable to removing it — encapsulation avoids generating fibers altogether.
An N95 respirator, safety glasses, and a hat are the basics. Drop cloths matter more than most people expect — scraped wet texture is heavy and messy, and doesn't sweep up cleanly. A shop vac with a HEPA filter handles dry debris far better than a broom, especially in corners and under ceiling fans.
Not always. The risk is highest when scraping dry, pressing too hard, or over-wetting the surface. Working in small sections and keeping the blade angle shallow cuts the damage significantly. But plan for some spot repairs regardless — the texture was hiding something.
Non-asbestos ceilings typically run $1–$3 per square foot for removal, skim-coat, and prep for paint. Asbestos abatement is higher — $3–$8 per square foot or more — because of the containment setup, certified crew, and regulated disposal. The cost gap between DIY and professional narrows fast once you factor in compound, primer, paint, and the repairs that come up along the way.
Water stains on bare drywall mean a leak happened at some point. Standard primer won't stop a stain from bleeding through finish paint — you need a stain-blocking primer on those areas first. And if the drywall around the stain feels soft or crumbles when you press it, the damage runs deeper than the surface shows, and that drywall may need to be replaced before you can move forward.
The Test Comes First. The Scraper Comes Second.
There is one honest answer here: if you don't know whether your texture contains asbestos, you don't yet know if this job is safe. The testing step isn't optional on any home built before 1980. It costs a few hundred dollars, takes two days to get results, and tells you exactly what you're dealing with. After that, you're either calling an abatement contractor or picking up a drywall knife. But you'll know which one.
Cesar's Painting handles popcorn ceiling removal and acoustic ceiling work across Woodbury, Maplewood, St. Paul, Minneapolis, Bloomington, and the Twin Cities metro. We work on tested and cleared ceilings and can point you toward certified asbestos inspection if you're uncertain about your home's age. Call (651) 650-4747 to schedule a free estimate.