
How to Prep Walls for a Lasting Paint Job: 6 Steps That Decide the Outcome
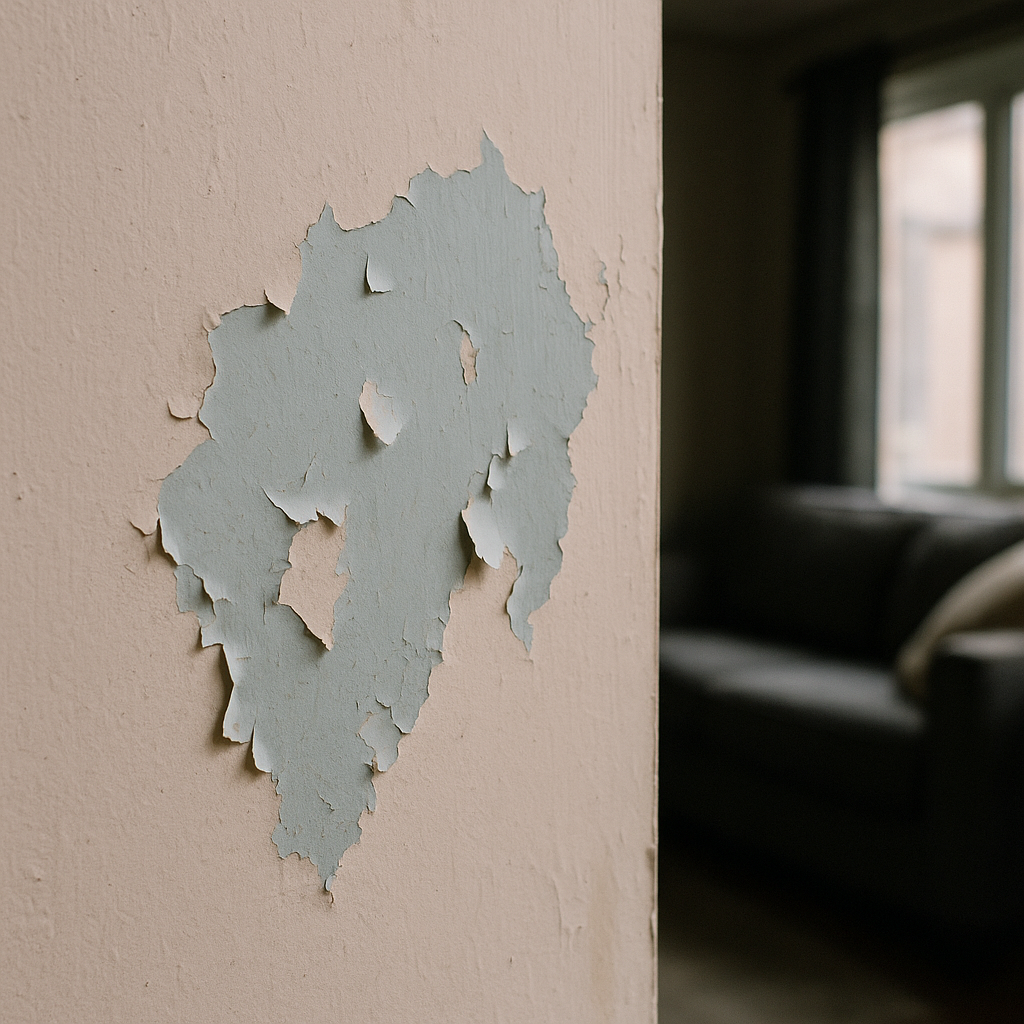
Most people judge a paint job by the last hour of work, the moment the roller lays down that final coat. The people who do this for a living judge it by the first few hours, before a single drop of color touches the wall. That is not stubbornness. It is physics.
Paint is a liquid that dries into a thin film, and a film can only hold onto a surface that is clean, sound, and dry. Bond to grease and the film peels. Bond to lose old paint, and the whole flake lets go together. Bond to a damp wall, and the coat blisters as moisture pushes out from behind. Everything that makes a paint job fail early traces back to the surface it was asked to grip. So prep is not the boring part you rush through to get to the fun part. Prep is where a lasting finish is won or lost.
Quick Answer: Prepping a wall means getting it clean, sound, and dry before any paint goes on. Wash off dust, grease, and grime; repair holes, cracks, and peeling paint; sand glossy areas so the new coat can grip; caulk gaps at the trim; and prime bare patches, stains, and slick surfaces. Each step does a different job, and skipping any one of them is the most common reason a fresh coat fails early.
Why Prep Decides Everything
Three different problems get solved before you paint, and it helps to keep them separate in your head because they are easy to blur together.
The first is adhesion, which is a fancy way of asking, "Does the paint actually stick?" That is what cleaning solves. The second is smoothness, whether the wall is flat and free of holes and ridges. That is what patching and sanding solve. The third is uniformity: whether the finished coat dries to a single, even color and sheen rather than a blotchy mix. That is what priming solves. Clean for grip, patch for smoothness, and prime for a sealed, even base. When any one of the three is missing, you see it in the result: a peeling corner, a bumpy patch that catches side light, or a dull spot where the wall drank up the paint faster than the area around it.
Think of it like painting a car. Nobody spray-paints over a rusty, dirty fender and expects the color to hold. They strip it, smooth it, and prime it first, because the coat is only ever as good as what sits underneath it. A wall works the same way, just with different tools.
Step One: Clean the Wall
Start by washing the surface, even when the wall looks perfectly clean. Dust settles on every vertical surface, and kitchens and bathrooms add a thin layer of cooking grease and soap film that you cannot see, but paint can feel. Wipe or wash the wall with a mild cleaner, then rinse with clean water to remove any residue, and let it dry.
Grease is the big one. In a kitchen, the wall above and beside the stove carries an oily film that will reject paint no matter how carefully you roll it. A degreasing cleaner cuts through that. In a bathroom, look for any mildew, the black or gray speckling that shows up in damp corners and near the shower. Mildew is a living thing, and painting over it does nothing but hide it for a few weeks before it grows right back through the new coat. It has to be killed and washed off first, not painted over.
Step Two: Repair the Surface
With the wall clean and dry, fix what is broken. Fill nail holes, small cracks, and dents with a patching compound or spackle, pressing it in and leaving it slightly proud so you can sand it flush later. For loose or peeling paint, scrape back to a sound edge, removing everything that lifts, then feather the transition so the boundary between old paint and bare wall is a gentle slope rather than a cliff. A hard edge telegraphs straight through the finish coat as a visible ridge.
If you find water damage, staining, softness, or bubbling, stop and find the source before you patch. A leak behind the wall or a roof problem overhead will keep feeding moisture into the surface, and any repair you make over it is temporary. Fix the water first, let the area dry fully, then patch.
Step Three: Sand for Tooth
Sanding does two jobs. It smooths your patches flush with the wall, and it dulls any glossy or slick areas so the new paint has something to bite into. Paint needs a slightly roughened surface, what painters call "tooth," to form a strong mechanical grip. A high-gloss or previously enamel-painted wall is too slick for its own grip, which is why fresh paint can peel right off a shiny surface in sheets.
A light sanding with a fine-grit paper knocks the shine down to a dull, even matte. You are not trying to sand the old paint off, only to scuff the surface. Wipe away all the sanding dust afterward with a damp cloth, because a coat of powder on the wall defeats the whole point.
Step Four: Caulk the Gaps
Where trim meets the wall, where baseboards and window casings and door frames butt up against the drywall, you will often find thin gaps. Run a bead of flexible, paintable caulk along those joints and tool it smooth. This is not just about looks, though it does give you a crisp, clean line where two surfaces meet. Caulk seals the seam so air and moisture cannot work their way behind the paint film from the edges, which is one of the quiet ways a finish starts to fail over time.
Use a caulk labeled paintable, since some silicone caulks do not accept paint and leave a shiny stripe you cannot cover.
Step Five: Prime Where It Counts
You do not always need to prime the entire wall, but you almost always need to prime somewhere. Prime every bare patch and repair, because raw drywall, joint compound, and spackle are porous and will drink paint unevenly. Prime over any stain with a stain-blocking primer so water marks, smoke, or old marker do not bleed through the new color. And prime slick surfaces or big color changes with a bonding primer.
The reason is uniformity and seal. Primer evens out the surface's absorbency, so the topcoat goes on at a consistent thickness and dries to a consistent sheen. Over a slick surface, a bonding primer gives the topcoat the grip it could not get on its own. Skip priming, and you get "flashing," those dull or shiny ghost patches where the wall underneath was behaving differently than the area around it.
Step Six: Protect the Area
The last step of prep is the one that saves your floors and fixtures. Mask off trim, outlets, and anything you do not want painted with painter's tape, pressing the edge down firmly so paint cannot creep under it. Cover floors and furniture with drop cloths. This is quick, it is cheap, and it is the difference between a clean job and an afternoon spent scrubbing paint off the baseboards.
A Few Safety Notes
If your home was built before 1978, the existing paint may contain lead, and sanding or scraping it can release lead dust that is hazardous to breathe. Have the paint tested before you disturb it, and follow lead-safe practices or bring in a certified pro if lead is present. When you use cleaners, primers, or solvent-based products, open windows and run a fan, because the fumes build up fast in a closed room. And on ladders, keep your hips inside the rails, do not overreach, and set the feet on solid, level ground rather than stretching from the top rung.
Frequently Asked Questions
A mild detergent handles most walls, but a greasy kitchen wall or one above a stove needs a degreaser or a TSP substitute, since ordinary soap just smears the grease around instead of lifting it off. The oily film there is thin enough to be invisible and thick enough to reject a coat. Work the degreaser in, then rinse with plain water so no cleaner residue is left to interfere with adhesion. Let the wall dry before anything else touches it.
Scuff-sand a glossy or enamel wall with about 150 to 220 grit to dull the sheen, or where sanding is impractical, use a liquid deglosser that etches the surface chemically so the new paint can grip. Either route turns a slick surface into one with enough tooth to hold a film. On trim and doors, the deglosser reaches into profiles that a sanding block cannot. Wipe the surface down afterward so no grit or chemical film is left behind.
Match the primer to the problem, since a water-based stain blocker handles light marks, but a shellac-based primer is needed to lock in water stains, smoke, or tannin bleeding from wood, which a water-based coat lets bleed right through. Bare patches and fresh compound call for a general drywall primer to even out absorbency. Slick surfaces and dark-to-light color changes require a bonding primer. Reaching for the wrong primer is why a stain reappears through the topcoat a week later.
Kill the mildew with a diluted bleach or a dedicated mildewcide, let it dwell, rinse, and let the wall dry (often a full day), because painting over live spores or a damp wall reblisters within weeks, no matter how good the paint is. The spores keep growing beneath the film, pushing discoloration back to the surface. Trapped moisture behind the coat forces its way out and lifts the paint into bubbles. Find and stop the water source first, or the same failure returns.
Feather each patch several inches past the repair and, on a smooth wall, skim a thin coat so there's no ridge, then spot-prime, since bare joint compound 'flashes' as a dull spot under the topcoat if it isn't sealed first. The compound drinks paint faster than the wall around it, so an unprimed patch dries flatter and catches side light. Sand the feathered edge flush so no step remains. A quick coat of primer over each repair equalizes how the whole wall absorbs the finish.
Use a paintable siliconized acrylic latex caulk at the trim and never pure silicone, which paint won't stick to, and for a gap wider than about a quarter inch, press in a foam backer rod first so the caulk has something to bridge. The backer rod stops the bead from sinking into a deep void and cracking as it cures. The acrylic-latex blend flexes with seasonal movement instead of splitting open. Tool the bead smooth so the joint reads as one clean line under paint.
Book a walkthrough with a crew that treats prep as the real work — that is how a finish holds up for years, not months. Cesar's Painting serves Minneapolis, St. Paul, Bloomington. Call (612) 203-5856.
