
How to Paint Oak Cabinets and Hide the Wood Grain
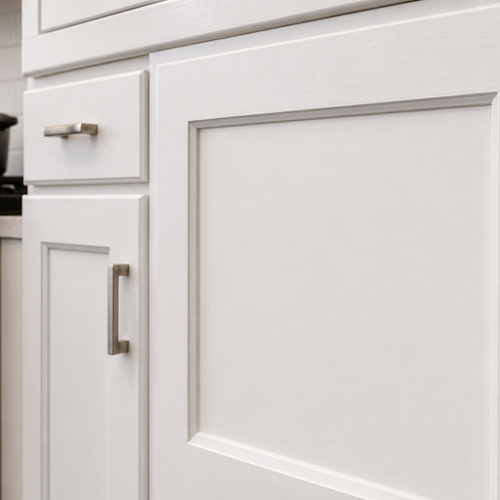
You paint the cabinets white. They look fine when the paint goes on wet. Then it dries — and every line of that cathedral grain is back, running through the surface like a ghost print. That's oak. And it's the single reason most DIY cabinet refinishing projects don't end up looking like the before-and-after photos.
Oak has one of the most open, coarse grain structures of any common cabinet wood. That visible grain gave the wood its character for decades — it's why oak kitchen cabinets were popular from the late 1970s through the mid-1990s. But character is exactly what you're trying to eliminate when you want a smooth, solid-color modern finish. The wood that made oak look great in 1988 is the same thing fighting every brush stroke now.
What follows is the actual mechanism — not just "sand more" — and the specific steps that produce a grain-free painted surface on oak.
Why oak grain shows through paint
Oak is a ring-porous hardwood. Its growth rings contain large, open pores aligned in a band, and between those bands, tighter pores form the background texture. Run your finger across bare oak and you can feel the grooves. Those aren't scratches — they're the vessels the tree used to carry water when it was alive.
Paint fills those grooves partially. A brush coat lays paint on top and pushes some down into the pores, but not evenly. As the coat dries and cures, it shrinks slightly — the liquid was spanning those pores, and the dried film settles into them. You're left with a surface that looks smooth in low light and shows every grain line in raking light or sunlight. Add a second coat without filling the grain first, and you've built a slightly thicker version of the same problem.
The same thing happens with primer. Skip the grain filler, go straight to a good bonding primer, and you get solid adhesion — but not a flat surface. You're painting over a bumpy substrate, and the film on top always follows the shape underneath.
The step that actually solves it: grain filler
Grain filler is not primer. It's a paste or liquid product formulated to pack into the open pores of wood, sand flush, and leave you with a flat surface before primer goes on. Without this step, you're not painting over oak — you're mapping it.
Water-based grain fillers like Aqua Coat Clear Grain Filler are what most cabinet shops use on oak. The process: sand the bare cabinet doors to 180 grit, apply the filler with a plastic spreader, pushing it across the grain direction so it packs into the pores rather than just coating the surface. Let it dry — usually 30 to 60 minutes — then sand back with 220 grit. The surface should feel noticeably different from the bare wood. If you can still see the grain pattern in raking light, apply a second pass.
Two applications of grain filler are standard on oak. In dry Minnesota winters, when indoor humidity drops below 20%, the wood pores can open slightly further than they would in summer — worth knowing if you're doing this work in January and wondering why one pass isn't cutting it.
Grain filler is cheap. A quart covers 150 to 200 square feet and runs $20 to $30. It's the most skipped step in DIY cabinet painting, and in my experience it's the single biggest reason DIY oak refinishing looks different from professional work.
Apply grain filler across the grain, not with it — pushing the paste perpendicular to the wood fibers packs the pores more completely. Wipe off the excess with a plastic spreader or old credit card before it dries. With the grain direction only, you're dragging filler out of the pores rather than forcing it in.
Primer: not all primers are equal on oak
After grain filling and sanding to 220, the surface is ready for primer. This is where oak introduces its second problem: tannin bleed.
Oak contains naturally occurring tannins and pigments that migrate upward through wet coatings. Apply a standard latex primer, and those tannins can bleed through and create yellow-brown staining — sometimes in the first coat, sometimes in the second. Older oak cabinets that have absorbed cooking grease for years are especially prone to this, because heat and oils open the grain and push extractives toward the surface.
Shellac-based primer seals both tannins and any remaining residue. Zinsser BIN is the product most painters keep on hand for this. It dries in 45 minutes, bonds to virtually any surface, and locks tannins below the finish film. The downside: it smells strongly of alcohol, requires denatured alcohol for cleanup, and demands real ventilation. In a closed kitchen in January, open windows and wear a respirator rated for organic vapors — not a dust mask.
For cabinets that don't show bleed, a high-adhesion water-based primer like Zinsser Bulls Eye 1-2-3 or Sherwin-Williams Extreme Bond is a reasonable choice with far easier cleanup. These won't seal tannins quite as aggressively as BIN, but for previously sealed cabinets in good condition, they work well.
Apply one full coat of primer, sand to 220, and wipe with a tack cloth before any paint goes on.
One more option: high-build or high-solids primer. Products like Sherwin-Williams High Build Primer or Kilz High-Build contain more solid content than standard primers — they fill more surface per coat and leave a thicker film after drying. On oak that's had grain filler applied and still shows slight texture, a high-build primer coat can knock out the remaining shallow pore shadow without a third round of grain filler. It's not a replacement for the filler step. But it works as a final leveling pass before topcoats. Sand it back to 220 the same way.
Application: why brushing doesn't get you to factory smooth
You can brush-paint oak cabinets. The finish won't look factory-smooth.
Brush and roller application leaves texture — roller stipple, brush marks, slight ridges at lap lines. On a fine-grained wood like maple, that texture is minimal and sands out with a light scuff between coats. On oak, the grain topography is already fighting you, and brush texture adds its own layer on top. Think of it like writing on paper that's been crumpled: the words go on, but they follow the wrinkles.
Spraying — with an HVLP sprayer or an airless setup dialed back for cabinet work — applies an even, self-leveling coat that doesn't introduce its own texture. The paint flows out flat. What's underneath is what you get, which is why the grain filler step matters so much.
If you're brushing anyway, choose a waterborne alkyd enamel. Products like Benjamin Moore Advance or Sherwin-Williams Emerald Urethane Trim Enamel have a longer open time than standard latex — they stay wet long enough to level out brush marks before they skin over. Still not spray quality, but far better than standard latex with a brush.
How many coats it actually takes
With grain filler under a proper primer, two coats of topcoat is standard on oak. Without grain filler, you can apply four coats and still see the grain — because you're painting over the topography, not filling it.
Each coat should be scuff-sanded with 320 grit after it dries completely — 24 hours minimum for waterborne alkyds, longer in cool temperatures. Wipe with a tack cloth between coats. The final coat goes on without sanding.
The full sequence looks like this:
| Step | Material | Grit / Notes |
|---|---|---|
| Sand bare wood | — | 180 grit, with grain |
| First grain filler coat | Aqua Coat or equivalent | Across grain; spreader |
| Sand grain filler | — | 220 grit |
| Second grain filler coat (if needed) | Aqua Coat or equivalent | Across grain; dry 30–60 min |
| Sand grain filler | — | 220 grit |
| Primer coat | Zinsser BIN or high-adhesion latex | One full coat |
| Sand primer | — | 220 grit; tack cloth |
| First topcoat | Waterborne alkyd enamel | Spray or brush |
| Sand topcoat | — | 320 grit; tack cloth |
| Final topcoat | Waterborne alkyd enamel | No sanding after |
Done right, the cabinet doors look like they were finished in a factory. Done without grain filling, they look like someone painted over wood — because they were.
What this means for a homeowner doing it themselves
Nothing above is technically hard, but it is time-consuming. The grain-filling and sanding steps alone add a full day to a kitchen cabinet project — longer for a bigger kitchen. Spraying requires a sprayer, a clean spray area (airborne dust kills a wet spray finish), and some practice keeping a consistent pass speed and distance.
The most common outcome for DIY oak cabinet painting without grain filler: the first coat looks acceptable, the second looks better, and the finished product looks handmade in raking light. If you're repainting for resale or want the finish to hold up to a buyer's walkthrough, the difference between prepped and unprepped is visible from six feet away in good light.
If the cabinets are solid wood with flat or raised-panel doors, grain filling each surface isn't optional — it's the difference between a painted finish and a coated finish. Coated means the paint is sitting on top of the grain. Painted means the grain is gone.
Frequently Asked Questions
Not necessarily. Visible grain through a previous paint job is usually a prep failure, not a cabinet quality problem. If the boxes are structurally sound, the doors hang square, and the hardware isn't worn through, painting correctly is a legitimate path. Where replacement makes more sense: cabinets with face frames that are soft, swollen from water damage, or delaminating at joints — conditions where new paint is just a coat over a problem that will keep moving. Grain alone isn't a reason to replace.
It works on solid wood oak and natural oak veneer. For wood-look laminate or thermofoil cabinets with an oak pattern printed on the surface, grain filler doesn't apply — the "grain" on those surfaces is photographic, not real wood. Real oak cabinets built before the mid-1990s are almost always solid wood or thick veneer. Cabinets from the early 2000s onward are more likely to be a mix of solid frames and engineered-wood or laminate panels.
With proper prep and a quality waterborne alkyd topcoat, 8 to 12 years is realistic in a typical kitchen. High-traffic areas near the stove, coffee station, or dish rack will show wear sooner — usually at the pull area and along the door edge where fingertips contact the surface. The finish film doesn't fail; the edges and surfaces that get touched constantly show the first signs. A touch-up with leftover paint at the five-year mark extends the look considerably.
You can, but the result will be worse. Doors painted in place don't get even coverage on back edges, can stick to the frame as the paint cures, and can't be sprayed properly. For a grain-free, factory-smooth result, doors come off, hardware comes off, and everything gets painted flat before reinstallation. The extra time spent pulling doors comes back in the quality of the finish.
Maple and MDF are both low-grain or grain-free substrates. MDF takes paint exceptionally flat because it's compressed fiber with no grain at all — just edge-sealing is required, not grain-filling. Maple has a tighter, shallower grain than oak and often takes paint well with just primer. If you've painted maple cabinets before and it went fine without grain filler, expect oak to behave differently. The extra prep is specific to open-grain species: oak, ash, and hickory are the most common ones found in older kitchens.
For a typical kitchen of 20 to 30 cabinet doors and drawer fronts, professional cabinet refinishing runs $1,500 to $4,000 in the Twin Cities area, depending on cabinet size, condition, and whether repairs are needed before painting. The price includes the prep work — cleaning, degreasing, grain filling, priming — that determines whether the finished result looks factory-made or handmade. Skipping prep doesn't save much labor, but it does drop the final quality significantly.
White makes grain show most clearly — any unfilled pore reads as a gray shadow against a bright white field. Medium-toned colors like warm gray, sage, navy, or soft black hide minor grain imperfections better because the shadow contrast is lower. That said, white and off-white are the most requested colors, and properly grain-filled and primed oak takes any color well. The prep, not the color, determines whether grain telegraphs through the finished surface.
Before you start
Painted oak cabinet jobs done right are multi-day projects, even for an experienced crew — not because the painting is slow, but because each step must fully dry before the next begins. Rushing the grain filler or primer drying time produces an adhesion problem that shows up months later as chipping at the edges or peeling along the frame. The job that looks great the day it's done and fails by the following spring almost always skipped the dry time, the grain filling, or both.
Cesar's Painting handles cabinet painting and refinishing across Woodbury, Maplewood, St. Paul, Minneapolis, Bloomington, and the Twin Cities metro. We grain-fill and spray oak cabinets using the full process described here — no shortcuts on the drying time or prep steps. Call (651) 650-4747 to schedule a free estimate.
