
Do You Need Primer? When It Actually Matters
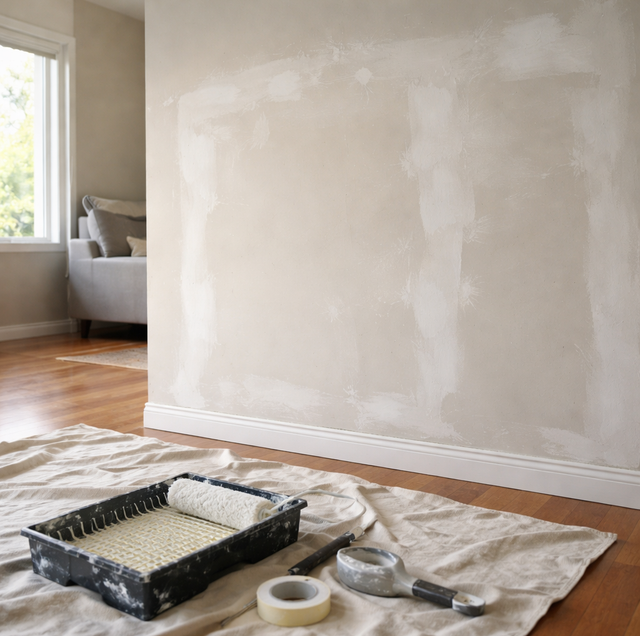
Quick Answer: You need a dedicated primer when the surface is bare, stained, glossy, patched, or you're making a big color or sheen change. You can skip a separate primer and use a self-priming paint when you're repainting a sound, clean, similar-colored wall that isn't slick or stained. Primer isn't about the paint you like less; it's a base coat that solves problems the finish paint can't.
Primer sits in a strange spot. Most people either treat it as a mandatory extra step for every project or skip it entirely to save a coat, and both habits waste effort or invite failure. The honest answer is that primer is a specialist. It does three jobs that finish paint does poorly, and once you know those jobs, deciding whether a given surface needs it stops being a guess.
What Primer Actually Does
A can of finish paint is built to look good and hold color. It is not built to grip a slick surface, seal a thirsty one, or hold back a stain. Primer is engineered for exactly those problems, and it does its work in three roles: bond, seal, and block.
Bond: Primer gives the topcoat something to grip. It contains resins that bite into difficult surfaces, from raw wood fibers to a glossy old finish, and then dries to a slightly toothy film that the finish paint can lock onto. Paint applied straight onto a slick or chalky surface has nothing to hold, which is why it later peels off in sheets.
Seal: Bare and porous surfaces, new drywall, fresh joint compound, raw wood, are thirsty. They drink the liquid out of finish paint unevenly, so some spots soak up more than others. Primer seals that porosity into a uniform surface, so the topcoat sits on top and dries to one consistent color and sheen instead of a patchy map of dull and shiny areas.
Block: Primer forms a barrier that stops unwanted things from migrating up into the new paint. That includes water stains, smoke residue, marker, grease, and the natural tannins in woods like cedar, redwood, and knotty pine, which bleed through ordinary paint as brown or yellow halos. A stain-blocking primer traps those so they never reach the surface.
A useful way to hold it in your head: finish paint is the clothing, and primer is the base layer that has to fit the actual body underneath. The same shirt hangs completely differently over bare skin, a wet swimsuit, or a bulky sweater. Primer makes the surface consistent so the finish coat behaves the same everywhere, no matter what it's covering.
Those three roles explain both halves of the primer question. Where a surface presents a bond, seal, or block problem, primer solves it and the finish paint alone cannot. Where none of those problems exist, primer has little to do, and a quality self-priming paint can carry the job.
When You Need Primer
These are the situations where a dedicated primer is doing real work, not just adding a coat.
Bare wood and new drywall: Both are porous and unsealed. New drywall and its joint compound especially need a PVA drywall primer to even out the difference between the paper facing and the mudded seams, which otherwise flash as visible bands under the topcoat. Bare wood needs sealing so it doesn't drink paint unevenly and raise its grain.
A big color change, especially dark to light: Covering a deep navy or red with a pale color can take four or five coats of finish paint alone, and the old color still ghosts through. A tinted primer knocks the base down toward the new color in one step, so the finish coats read true in two.
Glossy surfaces, after scuffing: Old oil trim, previously glossed doors, laminate, and slick cabinet finishes give paint nothing to grip. Scuff-sand to dull the shine, clean off the dust, then use a bonding primer so the topcoat actually adheres instead of peeling at the first knock.
Water, smoke, tannin, and grease stains: A finish coat painted over a water ring or smoke film will let it bleed right back through, sometimes within hours. These need a stain-blocking primer to seal the stain before any color goes on. Odor from smoke damage calls for the same sealing step to trap it.
Patched or skim-coated walls: Fresh joint compound and spackle are porous and flat, while the surrounding old paint is sealed and sheened. Paint over both and the repaired spots flash as dull patches, a look called flashing. Spot-priming those repairs, or priming the whole wall after a skim coat, evens the porosity so the finish dries uniformly.
Raw metal: Bare steel and iron need a metal primer, usually rust-inhibiting, both to bond and to keep rust from creeping under the paint. Galvanized metal needs a primer rated for it, since ordinary paint slides off the zinc coating.
A drastic sheen change: Going from a high-gloss surface to a flat finish, or the reverse, is really a bonding problem, and priming after a scuff-sand gives the new sheen a stable base to sit on.
When Paint-And-Primer-In-One Is Enough
Self-priming paints, the "paint and primer in one" products, are thicker finish paints with more binder. They are not a substitute for a real primer on a problem surface, but they handle the easy case well: repainting a wall that is already sound, clean, and a similar color, with no stains and no glossy or chalky trouble.
If you're refreshing a beige living room with a slightly different beige, over intact eggshell that isn't peeling or stained, two coats of a self-priming paint are truly all you need. The wall already provides bond and seal; there's nothing to block. Buying and applying a separate primer coat there adds time and gains nothing. The skill is telling that clean repaint apart from the surfaces that only look clean: a glossy door, a faintly water-stained ceiling, a wall someone smoked near for years, where a self-priming paint quietly fails.
The Main Types Of Primer
Primers are not interchangeable, and matching the type to the problem matters as much as using one at all.
PVA drywall primer: Water-based and inexpensive, made for new drywall and fresh joint compound. It seals the porous paper and mud so the topcoat lays down even. It is not a strong stain blocker, so it isn't the pick for covering water or smoke damage.
Bonding primer: Formulated to grip hard-to-coat surfaces, glossy trim, tile, laminate, previously oil-painted woodwork, after a light scuff-sand. This is the adhesion specialist.
Stain-blocking primer: Comes in shellac-based and oil-based versions. Shellac-based primer is the strongest sealer for heavy water stains, smoke, odor, and stubborn tannin bleed, and it dries fast. Oil-based primer blocks well too and bonds nicely to weathered surfaces. Both give off strong fumes and are flammable, so they demand real ventilation and a respirator, not just an open window.
Spot-priming versus priming the whole surface: You do not always have to prime a whole wall. Spot-priming, hitting only the repaired patches, the stains, or the sanded-through areas, is often the right call. Prime a water ring, a few filled nail holes, or a patched seam, then paint the whole wall over it. Full priming makes sense when the surface is uniformly problematic: an entire wall of bare drywall, a whole skim-coated ceiling, a big dark-to-light color change, or a room recovering from smoke. Priming everything when only three spots need it wastes a coat; painting over unprimed stains to avoid the extra effort just guarantees a callback.
You do not always have to prime a whole wall. Spot-prime just the repaired patches, the stains, or the sanded-through areas, then paint the whole wall over them. Save full priming for surfaces that are uniformly problematic, like an entire wall of bare drywall or a big dark-to-light color change.
Why Skipping Primer Bites Back
When primer is skipped on a surface that needed it, the failure is specific and predictable, not random bad luck.
Skip it on a glossy or chalky surface, and you get peeling, because the paint never bonded. Skip it on new drywall or patched spots, and you get flashing, dull and shiny patches where the porosity was uneven. Skip it over a water ring, smoke film, or cedar knot, and you get bleed-through, the stain rising back into the fresh paint as a brown or yellow ghost. None of these can be fixed by adding another finish coat; the fix is to strip or sand back, prime properly, and repaint. Primer is cheaper than doing the job twice.
On any home built before 1978, the existing paint may contain lead, and sanding or scraping it releases hazardous dust, so test suspect surfaces before disturbing them and follow lead-safe practices or hand the work to someone trained in it. Shellac-based and oil-based primers give off fumes that are both harmful and flammable, so ventilate hard and wear a proper respirator rather than relying on an open window. Any priming up high needs a stable ladder on solid footing.
Frequently Asked Questions
Not for bond or block problems. Extra finish coats over a glossy or stained surface still peel or bleed through, because the issue is what's underneath, not how much paint is on top. Extra coats can help with a mild color change on a sound wall, where a third finish coat may hide the old color as well as a tinted primer would. For adhesion and stains, no amount of finish paint replaces the right primer.
For big color changes, yes, it helps a lot. Most primers are white, but many can be tinted toward the finish color, usually to about 50 percent of the topcoat's tint load. A gray-tinted primer under a bold red or deep blue is a common trick, since those pigments cover poorly, and starting from gray can cut a five-coat job down to two finish coats.
It depends on the type. A PVA drywall primer is usually recoatable in three to four hours, while shellac-based primer can be ready in under an hour. Oil-based primer often needs overnight. Recoating too soon traps solvent and can wrinkle the finish, so check the product's stated recoat window rather than going by touch alone.
A shellac-based primer will seal and block the stain and odor, but it is a base coat, not a finish. It locks the discoloration and smell away so your topcoat stays clean, then you paint over it normally. One coat of shellac primer usually handles even heavy nicotine film that would otherwise bleed through several coats of wall paint.
Painted-over wallpaper seams and fresh patches both benefit from an oil-based or shellac primer, because water-based products can re-wet wallpaper paste or raise a paper patch. An oil or shellac primer seals without soaking in, holding the seam flat and keeping the patch from flashing under the finish coat.
Yes. Exterior primers are formulated to flex with wood that swells and shrinks through temperature and moisture swings, and to resist mildew and UV. An interior primer used outside will crack and fail early. Match the primer to the location, and for bare exterior wood, use a primer rated for outdoor use before any topcoat.
Not sure which surfaces need priming? Book a walkthrough and get it done right the first time. Cesar's Painting serves Minneapolis, St. Paul, and the Twin Cities. Call (612) 203-5856.
