
Why Paint Prep Decides How Long a New Coat Lasts
Quick Answer: Paint that lasts is built on prep, not just product. Cleaning removes grease, dust, and chalk that block adhesion. Scraping and sanding remove loose or failing material and create a surface the new coat can grip. Caulking seals joints and seams so water can't get behind the film. Priming locks down stains, bare wood, and porous patches so the topcoat cures evenly. Skip any one step and the finish can still look perfect at handoff, then fail early in exactly the spot that was shortcut.
A brand-new coat of paint always looks like a success. The color is even, the sheen is uniform, and every wall or clapboard looks like it will last a decade. That first impression is close to useless as a predictor of how the job actually performs. What decides whether paint holds for eight to twelve years or starts failing in eighteen months has almost nothing to do with the paint itself and almost everything to do with what happened to the surface before a single coat went on.
What Prep Actually Involves
"Prep" sounds like a single task, but it is really four or five distinct jobs stacked together, each addressing a different failure mode.
Cleaning removes the film of dust, pollen, cooking grease, and chalky oxidized paint that sits on almost every surface, indoors or out. Paint is designed to bond to a clean substrate. A layer of grease or chalk between the old surface and the new coat means the new coat is really bonding to that film, not to the wall or siding underneath, and the film can let go on its own.
Scraping and sanding deal with anything already failing. Loose, cracked, or flaking paint has to come off down to a sound edge, because painting over a loose flake just buys a few extra months before that flake takes the new coat with it. Sanding also scuffs a glossy or hard surface enough to give the next coat some texture to grip, since paint bonds better to a slightly roughened surface than to a smooth, slick one.
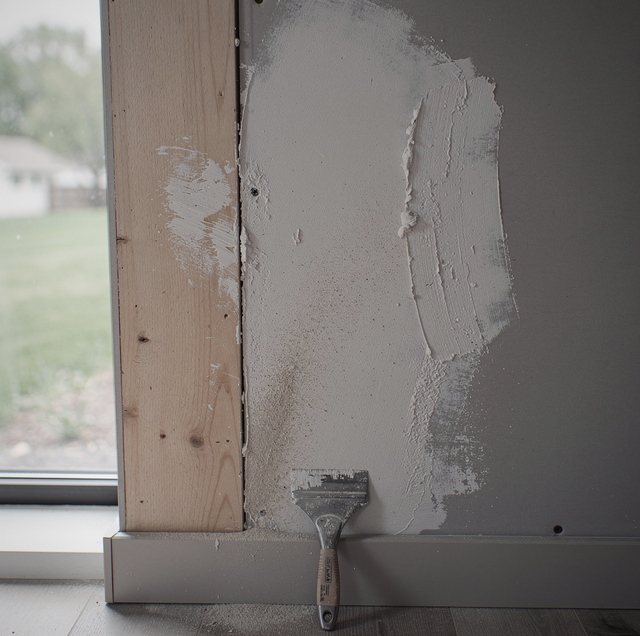
Patching and caulking handle physical gaps: nail holes, dents, cracked drywall seams, and open joints where trim meets siding or two boards meet at a corner. An open gap does two kinds of damage. It telegraphs through the paint once applied, and it gives water and air a path behind the finish, which is where a lot of paint failure actually starts.
Priming is the step most likely to get treated as optional, and it does some of the most technical work. Primer seals porous or bare material so the topcoat doesn't soak in unevenly, blocks stains and tannins from bleeding through, and gives the topcoat a uniform surface to bond to instead of a patchwork of old paint, bare patch, and fresh spackle that each absorb paint differently. Skip primer on a repaired or bare area, and that spot often ages differently than the rest of the surface, even when the topcoat is identical everywhere.
Why a Rushed Step Doesn't Show Up on Day One
This is what makes shortcuts on prep so easy to get away with, at least at first. None of these failures are visible at the moment of application. A coat applied over grease looks the same as one applied over a properly cleaned surface, right up until the bond starts to fail. A coat applied over an unprimed patch looks even and uniform on the day it dries, before the patch and the surrounding material start absorbing moisture at different rates.
Paint failure from bad prep is a delayed reaction, not an immediate one. Peeling due to poor adhesion often takes 1 to 3 years to show up, especially on surfaces exposed to weather, sun, or repeated humidity swings. Blistering from trapped moisture can take even longer if the source is intermittent, showing up only after a wet season or two pushes enough vapor through the film. A stain bleeding through an unprimed patch might not show for a full heating season, since it often needs sustained warmth or dryness to migrate to the surface.
That lag is why corner-cutting on prep is such a durable practice in the trade: the person who skipped the scraping or the primer coat is rarely still on-site, and often not even still in business, by the time the wall or siding shows the consequence.
How Skipped Steps Turn Into Specific Failures
Each shortcut in prep tends to produce its own signature failure, which is useful to know because it means the symptom on the wall often points backward to exactly what got skipped.
Peeling and flaking, where paint lifts in sheets or curls at the edges, almost always traces back to poor adhesion: paint applied over dirt, grease, chalk, or old paint that was already loose. The bond between coat and surface was never strong enough to hold, and gravity and temperature cycling eventually win.
Blistering, where the paint bubbles up in raised pockets, is a moisture problem. Water vapor trying to escape from inside a wall or from damp wood pushes against the paint film from behind. Good prep does not eliminate every moisture source, but it does include finding and addressing obvious ones, such as a failed caulk joint or a missing vapor barrier, rather than sealing them in behind a fresh coat.
Cracking and flaking in fine, spiderweb-like patterns often point to a coat applied too thick, over too flexible or unstable a substrate, or without enough cure time between coats, which sits closer to workmanship than to prep specifically but is frequently paired with rushed prep on the same job.
Uneven sheen and blotchy color, sometimes called flashing, are classic signs of skipped or partial priming. Patched, bare, and previously painted areas all absorb paint at different rates. Without a primer to even that out, those differences show up as dull or shiny patches once the topcoat cures, even when the same paint and the same number of coats went on everywhere.
Why Prep Is a Trade-Off, Not a Blanket Rule
It would be convenient to say every job needs the full prep sequence every time, but that isn't quite honest. A wall painted correctly two or three years ago, clean, dry, and free of failing paint, needs less prep than a wall with years of buildup, moisture history, or peeling paint. Sanding a surface that doesn't need it, or priming a patch smaller than a coin, adds time without adding meaningful durability.
The trade-off runs the other way, too. Full prep takes real time, and time is the single biggest cost driver in a paint job, since materials account for only a small fraction of the finished result. A contractor who spends an extra day scraping, patching, and priming a compromised surface is charging for that day. A contractor who skips it can finish faster and quote a shorter timeline. That difference in speed is not automatically a red flag. It only becomes one when the surface actually needed the work that got skipped, and nobody said so.
The honest version of this trade-off is that prep should scale to the condition of the surface, not to a fixed checklist applied the same way every time, and the quality of that judgment call is a big part of what separates a paint job that holds up from one that doesn't.
How to Tell If a Quote Includes Real Prep Work
Because prep failures don't show up for a year or more, the quote is often the only real signal a homeowner gets before committing. A few things distinguish a quote that accounts for actual prep from one that treats it as an afterthought.
A real prep scope names the surface's specific problems. If the quote mentions the peeling section on a trim board, the water stain over a shower, or the hairline cracks along a drywall seam, someone actually assessed the surface rather than pricing a generic job. A quote that reads the same regardless of the property's condition usually means the walkthrough was cursory or skipped.
A real scope separates prep time from paint time, even loosely. Two coats of paint take a fairly predictable amount of labor once a surface is ready. Scraping, sanding, patching, caulking, and spot-priming are the variable part, and a contractor who has actually planned for them will typically account for that variability rather than folding everything into one flat number that looks identical to every other bid.
A real scope specifies what happens to problem areas, not just good ones. Ask directly what happens to loose paint, to a cracked seam, or to a stained ceiling patch, and a contractor who intends to do the work will describe a method: scrape to sound material, feather the edge, spot-prime, then coat. A vague answer, or an answer that skips straight to "we'll paint over it," is worth pressing on before the job starts, not after.
Finally, a real scope treats moisture and structural issues as something to flag, not paint over. A contractor doing prep right will point out a leak, a rotted board, or persistent dampness as something to fix first, because painting over an active problem hides it and guarantees an early repeat failure.
What Good Prep Looks Like While Work Is Happening
Beyond the quote, the job site itself tells a story once work begins. Dust and paint chips from scraping and sanding should be visible and cleaned up, not just painted over. Caulk lines at trim and siding joints should look fresh and continuous, not patchy or missing. Patched areas should be sanded flush and, ideally, visibly primed before the topcoat goes on. None of this is dramatic to watch. It's slow work that happens before the part anyone photographs, which is exactly why it's the part most likely to get compressed when a job is running behind schedule.
The paint itself, meanwhile, gets almost all the credit or blame after the fact, which is a little unfair to the material. A premium product applied over a poorly prepped surface will still fail early, and a mid-grade product applied over a properly prepped one will often outperform expectations. The surface underneath does more of the long-term work than the can it came out of.
Frequently Asked Questions
Less than most people assume. Paint chemistry affects flexibility, fade resistance, and how well a color holds its tone, but none of that matters if the film is bonded to grease, chalk, or unstable old paint. A mid-grade paint over correctly prepped surfaces routinely outlasts a premium paint applied over a surface that was cleaned and primed poorly.
On a surface with real issues (peeling sections, cracked caulk joints, or several patch areas), prep can account for a third or more of the total time on the job, sometimes stretching a simple interior repaint from one day to two, or an exterior job from a few days to closer to a week, depending on how much scraping and priming is needed.
Washing surfaces and clearing furniture or debris are reasonable tasks for a homeowner to handle before a crew arrives. Scraping, sanding to the right texture, and priming are best left to the crew doing the painting, since inconsistent prep between two different people on the same wall or elevation often shows up later as uneven sheen or adhesion differences between sections.
Usually not directly, but it can be a sign that a moisture problem was painted over instead of addressed. A lingering musty smell after a repaint, especially in a bathroom, basement, or a wall that has had water issues before, is worth investigating for mold or trapped moisture behind the surface rather than assuming it will fade with time.
On homes built before 1978, lead paint testing matters before any scraping or sanding disturbs old paint layers, since dry-sanding or scraping lead paint can release hazardous dust. A contractor working on an older structure should include this step in the prep plan rather than omit it.
Failure concentrated at joints, seams, and previously repaired spots, rather than spread evenly across a surface, is the clearest sign. Even, overall fading or chalking points to normal aging. Peeling or blistering isolated to caulk lines, patched drywall, or specific trim boards points to a prep step that was skipped or rushed in exactly those spots.
Ask about a full prep-first estimate — get a plan that spells out cleaning, repairs, and priming before a single coat goes on. Cesar's Painting serves Minneapolis, St. Paul, and Bloomington. Call (612) 203-5856.
