
How to Paint Trim and Doors for a Finish That Lasts
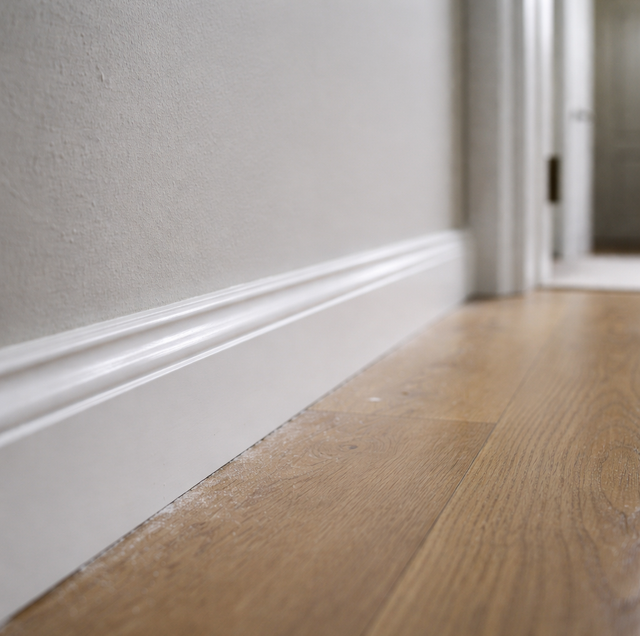
Quick Answer: For a durable, smooth finish on trim and doors, clean and degrease the surface, fill holes and caulk gaps, sand to dull the old finish, spot-prime bare or glossy areas, then apply thin coats of a waterborne alkyd trim enamel with a quality angled sash brush or mini-foam roller, working with the grain and keeping a wet edge.
Trim and doors carry the whole house at eye level. Baseboards, casings, and door edges sit right where hands touch, shoes scuff, and daylight rakes across the surface. A wall can hide a lot of sins because you view it from across the room. Trim gets studied from a foot away, which is why every ridge, every stray bristle mark, and every soft spot in the paint shows.
That close-up scrutiny is what makes trim unforgiving. The same coat that looks flawless on a ceiling will read as sloppy on a door panel. A smooth, hard, brush-mark-free finish on woodwork comes down to three things working together: patient prep, a paint built for the job, and technique that lets the coating settle out on its own. Miss any one and the other two cannot save it.
Why Trim Punishes Shortcuts
Woodwork sees more physical abuse than any wall in the house. Doors get slammed, kicked at the bottom, and grabbed at the edge. Baseboards meet the vacuum, the mop, and the occasional boot. Because the paint has to stay hard and washable under that traffic, it dries slower and harder than wall paint, which gives it more time to show whatever is underneath. A sloppy patch, a glossy spot the paint could not grip, a bristle dragged through half-set enamel: all of it telegraphs through.
Think of the finish as a mirror laid flat over the wood. It reflects the surface it sat on. If the wood was smooth, clean, and evenly dull, the mirror is clean. If the wood had a ridge or a shiny patch, the mirror shows the flaw magnified. So the work happens before the brush ever loads.
Clean and Degrease First
Hands leave oils. Kitchen and bathroom trim collects a fine film of cooking grease and hairspray. Door edges near the knob pick up skin oil daily. Paint will not bond to any of it, and a coat laid over grime peels or beads at the first wash.
Wash with a degreasing cleaner: Wipe the trim and doors with a household degreaser or a diluted trisodium phosphate substitute, then rinse with clean water and let the surface dry fully. Pay extra attention to the strip of door around the handle and the bottom rail, where grime builds up thickest. A surface that squeaks slightly under a clean rag is ready.
Fill, Caulk, and Set the Stage
Old trim carries a history of nail holes, dings, and gaps that opened as the house settled. Fixing them now is far easier than trying to hide them later.
Fill dents and nail holes: Press a lightweight spackle or a two-part wood filler into holes and dents with a putty knife, slightly overfilling so it can be sanded flush. Two-part fillers dry harder and sand cleaner on trim that takes knocks, which suits door edges and baseboards.
Caulk the gaps: Run a thin bead of paintable acrylic-latex caulk where trim meets the wall and where mitered corners have opened. Tool it smooth with a damp fingertip. Caulk closes the shadow lines that make old woodwork look tired, but only paintable caulk takes a coat cleanly. Silicone rejects paint, so keep it off trim you plan to finish.
Sand to Give the Paint a Grip
Sanding does two jobs. It knocks down filler, old drips, and raised grain to a level surface, and it dulls the existing sheen so the new coat has microscopic tooth to lock into. Skipping this step is the single most common reason a fresh coat later peels off in sheets.
Dull the old finish: Scuff the whole surface with 150 to 180 grit until the shine is gone and the surface feels uniformly matte. You are not stripping to bare wood, only breaking the gloss. Wipe away every trace of dust with a tack cloth or a damp microfiber, because grit left behind becomes a bump in the finish.
Trim painted before 1978 may contain lead, so test with a lead swab first and, if it reads positive, follow lead-safe practices instead of dry-sanding. Wear a dust mask and eye protection for all sanding. Solvent-based primer fumes are strong and flammable, so open windows, run a fan, and wear a respirator rated for organic vapors while you work.
Scuff between coats too: After the first coat cures enough to sand, give it a light pass with 220 grit and wipe clean. This knocks off any dust nibs and gives the second coat something to bite, which is what makes the final surface feel like glass.
Prime the Spots That Need It
Full trim rarely needs a full prime coat, but the trouble spots do. Bare wood from sanding, water or tannin stains, knots, and any patch of stubborn gloss all call for primer before color goes on.
Choose the primer to the problem: A bonding primer grips slick, previously glossy surfaces that sanding alone will not fully tame. A stain-blocking primer seals water rings, tannin bleed from knots, and marker or ink so they do not ghost through the topcoat. Spot-prime those areas, feather the edges, and let the primer cure per its label before painting. One caution on solvent-based primers: their fumes are flammable and strong, so open windows, run a fan, and wear a respirator rated for organic vapors while you work.
Pick a Paint Built for Trim
Wall paint on trim is a mistake you feel every time you clean it. Trim needs an enamel that dries hard, resists scuffs, and levels itself as it sets.
Waterborne alkyd or acrylic-alkyd enamel: A waterborne alkyd or acrylic-alkyd trim enamel is the sweet spot for most homeowners. It flows out and self-levels like an old oil paint, drying to a hard, smooth film, but it cleans up with water and yellows far less than true oil. That self-leveling is what erases brush marks as the paint sets, so the surface reflows flat after the brush lifts.
Sheen: semi-gloss or satin: Semi-gloss is the traditional trim sheen. It wipes clean and throws a crisp line against a flatter wall. Satin reads softer and hides minor surface flaws better, which suits older, wavier woodwork. Both are washable enough for daily traffic. Flat has no place on trim, since it holds dirt and cannot be scrubbed.
Technique: Let the Paint Do the Work
Good trim paint wants to level itself. The job of technique is to lay it on evenly and then get out of its way before it starts to set.
The right tools: A quality angled sash brush, two to two and a half inches, cuts crisp lines and reaches into profiles. For flat, wide surfaces like door panels and slab doors, a mini-foam roller lays down a thinner, more uniform film than a brush and leaves no bristle marks. Many painters roll the broad areas and immediately tip them off with a nearly dry brush to smooth the roller stipple.
Thin, even coats: Load the brush and spread the paint in the direction of the grain. Two thin coats always beat one thick one. A heavy coat sags, runs, and skins over on top while staying soft underneath, which is how you get a fingerprint in the finish a day later.
Keep a wet edge and tip off: Work in sections and always brush back into paint that is still wet, so the laps blend instead of leaving a dry ridge. Once a section is covered, make one or two light passes with an unloaded brush tip in a single direction to level the surface. Then stop. Overbrushing after the paint begins to tack drags the setting film into ridges, which is the opposite of what you want.
Handle the Hardware and Door Order
Hinges, knobs, latches, and strike plates all get in the way of a clean line.
Remove or tape hardware: Unscrew knobs, latch plates, and if you can, the whole door from its hinges. Painting a door flat on sawhorses lets the enamel level under gravity instead of sagging down a vertical face. Taking a door off is a two-person lift and a pinch risk at the hinges, so have a helper. If a piece of hardware has to stay, mask it cleanly with tape.
On a paneled door, work in an order that keeps wet edges from colliding. Paint the recessed panels and their molded edges first, then the horizontal rails, then the vertical stiles last with full top-to-bottom strokes, so each fresh section blends into one that is still slightly wet.
Let It Cure Before Real Use
Dry to the touch is not the same as cured. Trim enamel can feel dry in hours but stay soft inside for days, and closing a door or stacking objects against a baseboard too soon prints marks that never fully heal.
Give it time and airflow: Wait the full recoat window the label states between coats, and once the last coat is on, keep doors propped and traffic light for several days while the film hardens. Good airflow speeds the cure and clears fumes. A little patience here is what separates a finish that stays crisp for years from one that dents the first week.
Frequently Asked Questions
A bonding primer improves grip on glossy surfaces, but a light scuff sand still helps, especially on hard, slick old oil finishes. The two work together: sanding gives mechanical tooth, and the primer adds chemical adhesion. On a truly tricky surface like a factory-finished slab door, use both rather than trusting the primer alone.
Ridges, called brush marks, usually come from overworking the paint after it starts to set, or from a paint that does not self-level. Switch to a waterborne alkyd enamel, load the brush properly instead of scrubbing a thin amount, and add a paint conditioner like a flow additive if the air is warm and the paint is setting fast. Stop tipping off the moment the surface starts to grab.
A mini-foam roller works well on flat door faces and wide casings, but it cannot reach inside panel profiles or cut a clean edge against a wall. The common approach pairs them: roller for the broad flats, angled brush for the details and the tip-off. A roller-only door often shows a faint orange-peel stipple that a light tip-off with a brush removes.
Follow the label, but most waterborne alkyd enamels want at least a few hours, often overnight, before recoating. Recoating too soon lifts the first coat and traps solvent, which leaves the film soft. In humid conditions, the wait stretches longer because slow evaporation delays the cure.
A persistently tacky finish usually means the enamel was applied too thick, recoated before the layer beneath cured, or laid over a waxy or greasy surface that blocked proper drying. Heat and humidity slow curing further. Prevention is thin coats, full degreasing, and respecting the recoat window. A stuck film sometimes needs to be sanded back and redone.
They can match, and matching semi-gloss across doors and casings gives a unified, easy-to-clean look. Some designers drop doors to satin while keeping casings in semi-gloss for subtle contrast. The practical rule is that both need a washable sheen, so keep doors and trim in satin or semi-gloss and never flat.
Ready for trim and doors that look sharp up close and take daily abuse — get a finish that holds. Cesar's Painting serves Minneapolis, St. Paul, and the Twin Cities. Call (612) 203-5856.
